
How to Create an Email ID in Plesk Panel
Creating an email ID in Plesk Panel is easy. Just follow these steps:
Step 1: Log in to Plesk Panel
- Open Plesk Panel: Go to your web browser and type in your Plesk Panel URL (something like https://example.com:8443).
- Enter Your Details: Put in your username and password.
- Log In: Click the "Log in" button.
Step 2: Go to the Mail Section
- Find Mail Section: On the left side of the Plesk dashboard, look for "Mail" or "Mail Accounts".
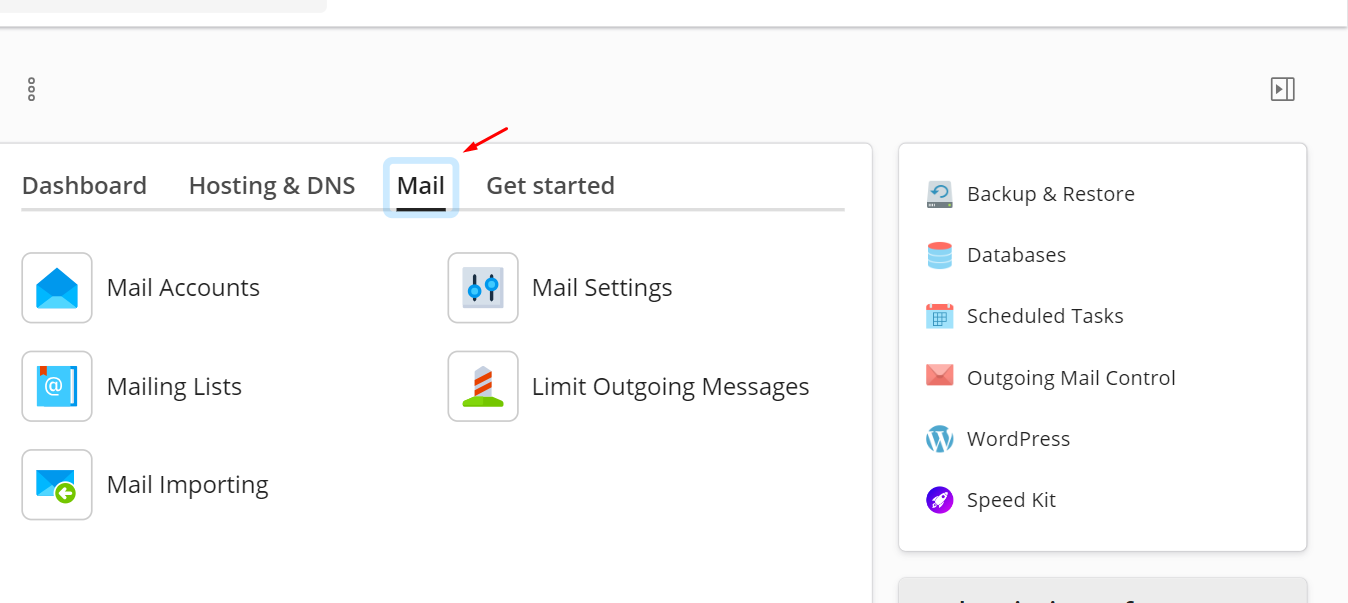
- Enter Mail Management: Click on the "Mail" icon.

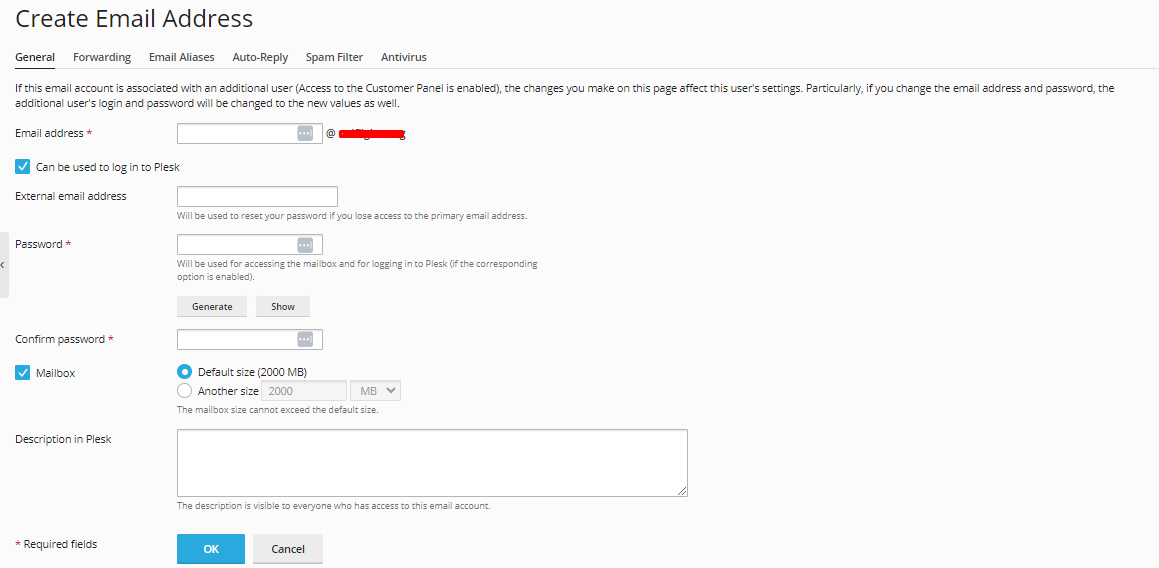
Step 3: Add a New Email Account
- Create Email Address: Click the "Create Email Address" button.
- Fill in Email Details:
- Email Address: Enter the email name you want (like [email protected]).
- Password: Type in a strong password with letters, numbers, and special characters.
- Confirm Password: Type the password again to confirm.
Step 4: (Optional) Configure Additional Settings
- Mailbox Size: Set a limit for your email storage if you want.
- Auto-Reply: Enable auto-reply for automatic responses.
- Email Forwarding: Set up email forwarding to another address.
- Anti-Spam Settings: Adjust settings to filter spam emails.

Step 5: Save the Email Account
- Save Settings: Click "OK" or "Save".
- Confirmation: A message will show that your email account is created.
![]()
Step 6: Access Your New Email Account
- Using Webmail: Go to webmail.example.com and log in with your new email address and password.
- Email Client Configuration: Use these settings for your email app (like Outlook or Thunderbird):
- Incoming Mail Server: mail.your-domain.com
- Outgoing Mail Server: mail.your-domain.com
- Username: Your full email address
- Password: Your email password
- Port Settings:
- IMAP: Port 143 (non-SSL) or 993 (SSL)
- POP3: Port 110 (non-SSL) or 995 (SSL)
- SMTP: Port 25, 587 (non-SSL), or 465 (SSL)
- Authentication: Ensure "My outgoing server (SMTP) requires authentication" is checked.
Info! Ensure you keep your email settings secure by using strong passwords and enabling necessary security settings.
Final Summary:
You've successfully created a new email ID in Plesk Panel. If you have any issues, check the Plesk documentation or contact your hosting provider for help. Make sure to keep your email settings secure.
Success! Your new email account is ready to use.
If you need more help, you can open a support ticket or start a LiveChat session using the icon at the bottom right of the screen.