Integrating your cPanel domain email account with Gmail allows you to manage your professional emails through Gmail's user-friendly interface. This guide walks you through the process step-by-step, ensuring a smooth setup. Before proceeding, ensure you have an active email account in your cPanel. If not, please follow the guide on setting up a new email account using cPanel here.
Why Connect Your Host Email to Gmail?
Managing several email accounts through cPanel's webmail can be cumbersome and time-consuming. An efficient alternative is to centralize your email management in Gmail. This saves time and leverages Gmail's advanced features for handling your site's emails.
Step 1: Log in to cPanel
First, log in to your cPanel account. If you're unsure how to do this, our guide will assist you at How do I login to my HosterPK cPanel?
Step 2: Set Up Your Email Account in cPanel
After logging in, create an email account if you haven't already. For instructions, visit How to Set Up a New Email Account Using cPanel. Note the email settings provided by cPanel, as you'll need them later.
Step 3: Access Your Gmail Account Settings
- Open your Gmail account.
- Click on the gear icon in the upper right corner, then select “See all settings.”
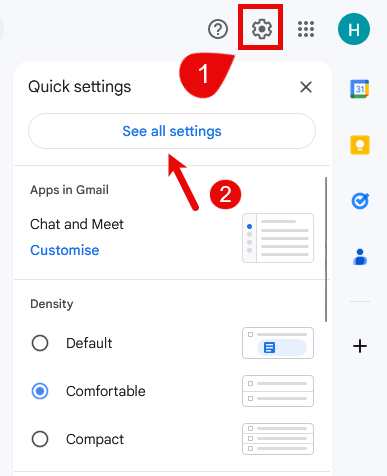
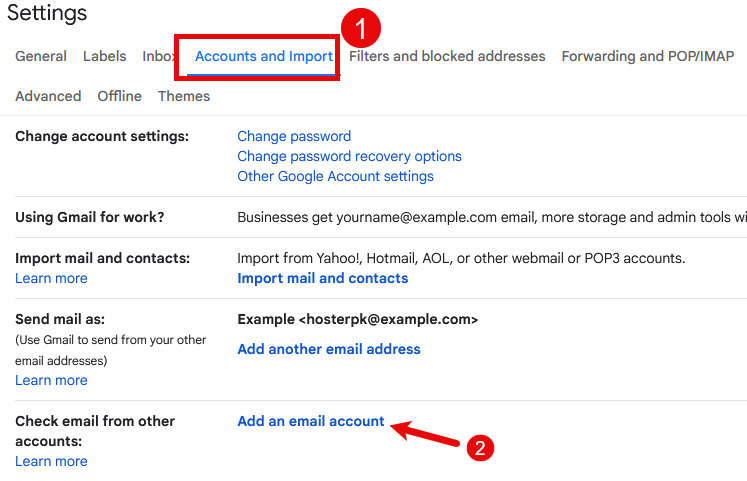
- Go to the “Accounts and Import” tab.
- In the "Check mail from other accounts" section, click "Add a mail account."
Step 4: Enter Your Email Information
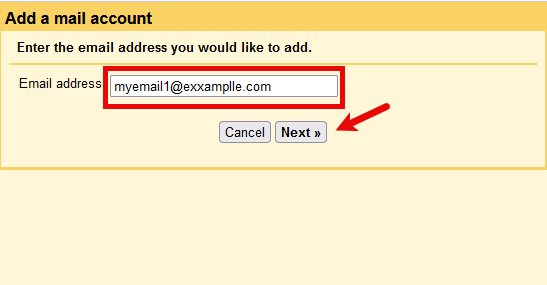
- A window will pop up. Enter your full email address created in cPanel and proceed by clicking "Next."
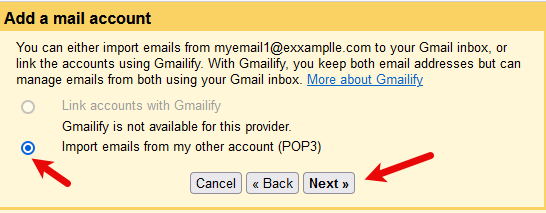
- Select "Import emails from my other account (POP3)" and click "Next."
Step 5: Configure Mail Settings
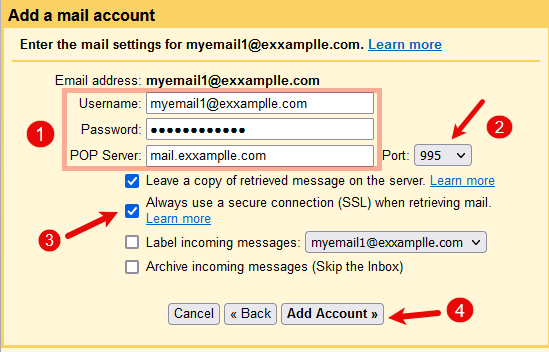
- Username: Your full email address.
- Password: The password for your cPanel email account.
- POP Server: This will be provided in your cPanel email settings. Usually, it looks like mail.yourdomain.com.
- Port: Typically, 995 for POP3 with SSL encryption. Check if "Leave a copy of the retrieved message on the server" is according to your preference.
- Always use a secure connection (SSL) when retrieving mail: Check this option.
- Proceed by clicking "Add Account."
Step 6: Decide on Sending Emails
- You'll be asked if you want to send emails as the cPanel account email. If you choose yes, follow the prompts to fill out the SMTP server details provided by cPanel.
- SMTP Server: Usually, it's the same as the POP server, e.g., mail.yourdomain.com.
- Port: Typically, 465 for SMTP with SSL encryption.
- Username: Your full email address.
- Password: The password for your email account.
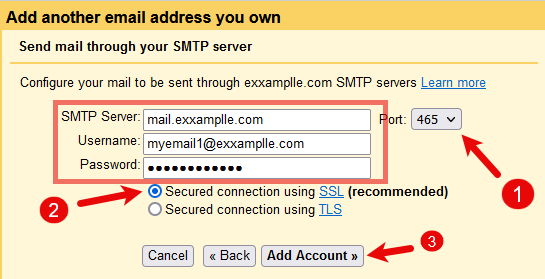
Complete the process by following the on-screen instructions, including verifying your email address.
Confirmation to Allow Gmail to Send Emails
After configuring Gmail to send emails as your cPanel account, Gmail will require confirmation to ensure you own the email account being added.
- Log back into your cPanel and navigate to the webmail for your email account.
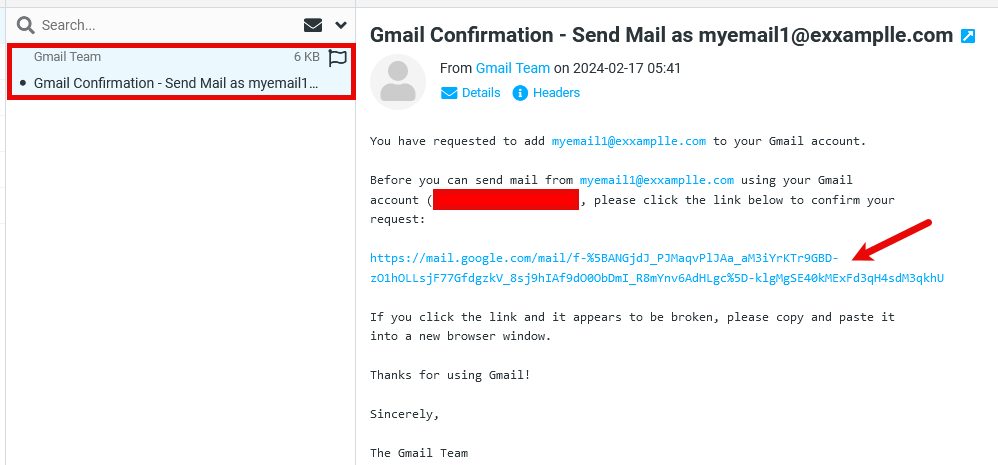
- Access RoundCube or your preferred webmail client to find the confirmation email from Gmail.
- Open the email and click the confirmation link provided.
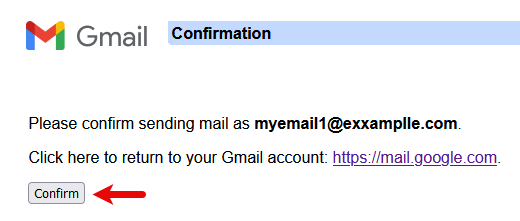
- Click the "Confirm" button in the Gmail confirmation page that opens.
- Once you've completed the steps above, a confirmation code will be sent to the email address you're adding to Gmail. Locate this code in your cPanel webmail, enter it in Gmail, and click "Verify" to finalize the connection. This confirms that your cPanel email account is now linked to Gmail, allowing for both the sending and receiving of emails.
How to Send an Email with the Newly Added cPanel Account in Gmail
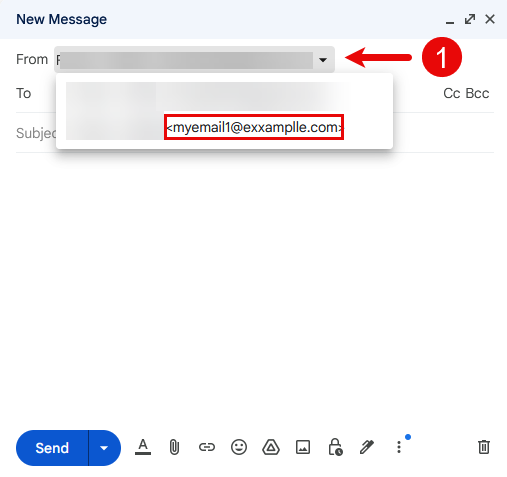
- Click the "Compose" button in Gmail.
- Use the dropdown arrow next to the "From" email address to select your cPanel email account.
Authenticating Your cPanel Email Address
To enhance your email's professionalism and ensure recipients trust it:
- Navigate to the "Authentication" section under the Email heading in cPanel.
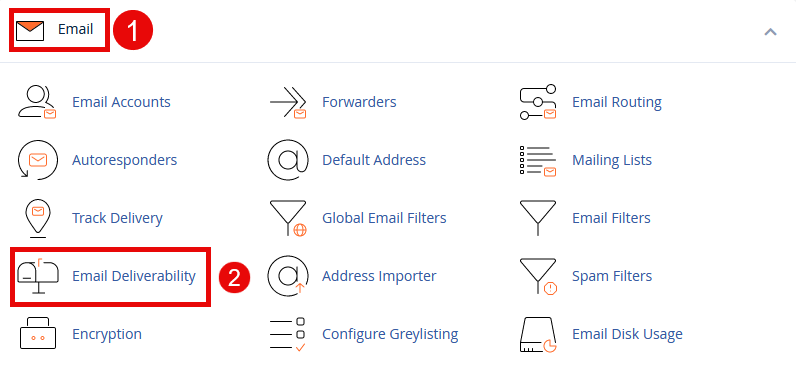

- Enable DKIM for your email account to authenticate outgoing emails, reducing the likelihood they're marked as spam.
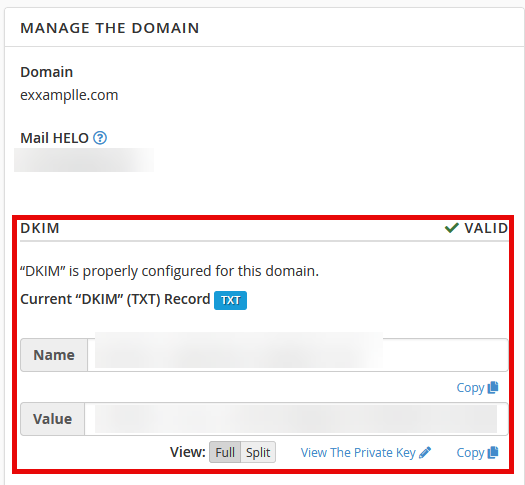
After enabling DKIM, give it some time for the changes to propagate. If issues persist, contacting your hosting provider may be necessary. Once authenticated, your emails will display your profile photo instead of a question mark in Gmail, signaling to recipients that your emails are legitimate and secure.
Troubleshooting
If you encounter any issues, please open a support ticket here or initiate a LiveChat session using the icon at the bottom right of the screen. For enhanced email solutions, consider our professional email service here.
Remember, integrating your cPanel email with Gmail streamlines your email management and leverages Gmail's powerful features for your business communications.
This guide aims to provide you with all the steps to integrate your cPanel domain email account with Gmail seamlessly. For further assistance, do not hesitate to contact our support team.
