
Setting up and managing email aliases and forwarders in cPanel is a simple process that can significantly streamline email management, particularly for individuals juggling multiple email addresses or domains. This guide will walk you through the essential steps of configuring and utilizing email aliases (forwarders) in cPanel, covering creation, removal, and useful functions like autoresponders and domain-wide forwarding.
What are Email Forwarders?
Email forwarders are invaluable for individuals juggling multiple email accounts seeking to streamline communication. For instance, if you maintain distinct email addresses for sales, support, and personal correspondence, configuring forwarders ensures all emails destined for these accounts converge in a unified mailbox. This streamlines email administration, enabling you to monitor one account instead of managing several.
What are Alias Options?
Aliases are perfect for businesses that want to use multiple email addresses for different functions (e.g., [email protected], [email protected]) without needing separate email accounts. This not only simplifies email management but also ensures consistency in communication.
Benefits of Using Email Forwarders and Email Alias
- Efficiency: Save time by managing all your emails from a single account.
- Organization: Keep your email accounts organized and reduce the risk of missing important emails.
- Convenience: Easily forward emails to colleagues or departments as needed.
Step-by-Step Process to Create an Email Forwarder / Alias
Creating an email forwarder or alias is a powerful feature that automatically allows you to forward emails from one email address to another. This can be particularly useful in various scenarios, such as when you need to ensure that multiple team members receive customer inquiries or you want to manage several email addresses without the need to check multiple inboxes. In this article, we'll guide you through setting up an email forwarder or alias using cPanel, provided by HosterPK.
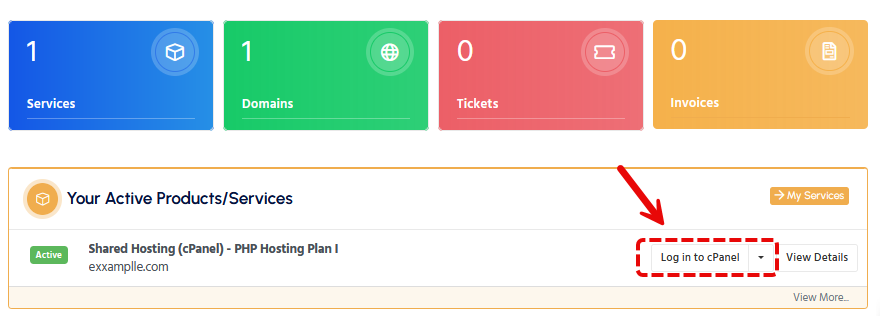
Step 1: Log in to cPanel
First, you need to log into your cPanel account. You can access cPanel directly through the HosterPK client area at https://www.hosterpk.com/clientarea/. Navigate to the Services section and click on the relevant hosting account to find the cPanel login link.
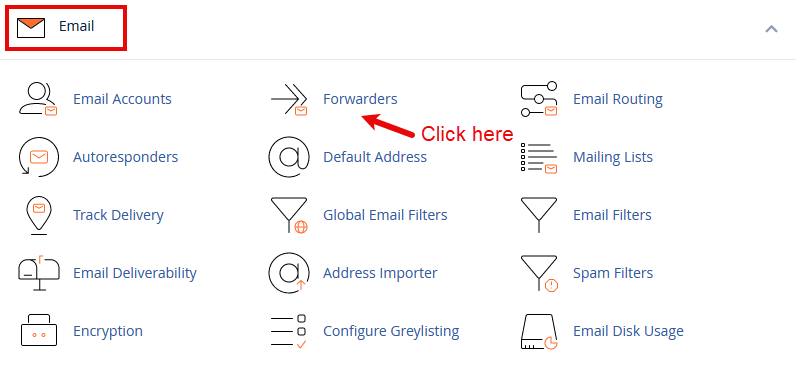
Step 2: Navigate to Email Forwarders
Once logged in to cPanel, scroll down to the Email section and click Forwarders. This will take you to the page where you can manage all your email forwarders.
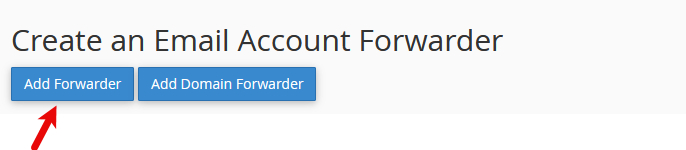
Step 3: Add a New Forwarder
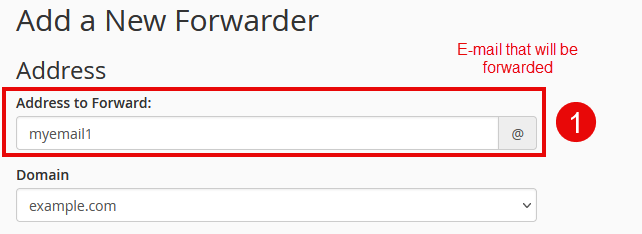
Click on the Add Forwarder button. You'll be prompted to enter the address you want to forward from here. For example, if you want all emails sent to [email protected] to be forwarded, you would enter "info" in the first box and select your domain from the dropdown menu.
Step 4: Specify the Forwarding Address
In the Destination field, you'll specify where you want the emails to be forwarded to. This can be any valid email address, including ones outside your domain, such as a Gmail or Outlook address.
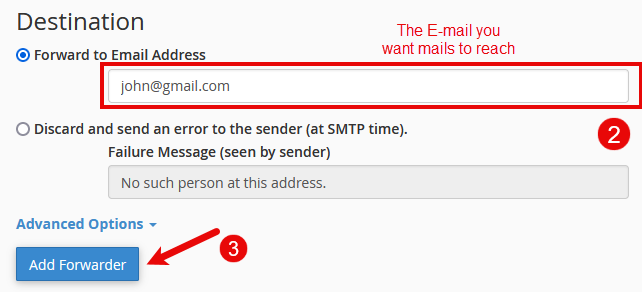
After entering the forwarding address, click on Add Forwarder to complete the setup. You should now see the new forwarder listed on the Forwarders page, indicating that it's active.
After creation, you can view the forwarder details, including the name, target email, and options to trace or delete the forwarder.
Considerations and Best Practices
- Privacy: Be mindful of who can access forwarded emails, especially in a business context.
- Spam Filters: Ensure that your forwarding rules do not trigger spam filters, leading to important emails being missed.
- Organization: Regularly review and update your forwarding and alias settings to match current needs.
Steps to Delete an Email Alias in cPanel
Follow these steps to remove an email alias from your cPanel account:
-
Log in to cPanel: Access your cPanel dashboard by visiting https://www.hosterpk.com/clientarea/ and entering your credentials.
-
Navigate to the Email section: Once logged in, look for the "Email" section and click on the "Forwarders" option.
-
Find the Alias to Delete: In the Forwarders page, you'll see a list of all your email aliases. Locate the one you wish to delete.
-
Delete the Alias: You'll find a "Delete" option next to the email alias. Click on it, and confirm the deletion when prompted.

After successfully deleting the email alias, verifying that your email setup is working as intended is good practice. If the alias was redirecting important emails, make sure to update your records or notify the relevant parties of the change.
How to Implement Forwarder on All Email Ids for a Domain
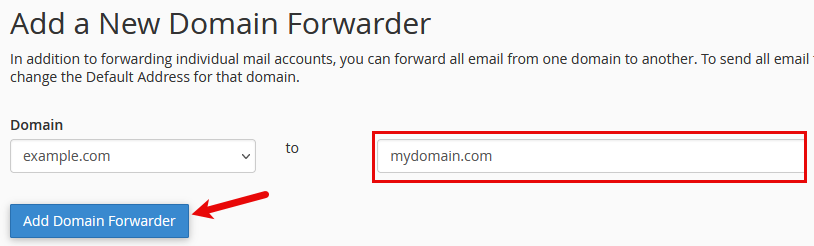
For those managing multiple domains, cPanel allows you to forward all emails from one domain to another. This is ideal for consolidating emails from various domain names into a single inbox. To set up domain forwarding:
- In the Forwarders section, select Domain Forwarders.
- Choose the domain you wish to forward emails from.
- Enter the target domain name where all emails will be redirected.
- Confirm to apply the forwarding. This ensures that emails sent to any address at the original domain are automatically redirected to the corresponding address at the target domain.

What is an Autoresponder?
An autoresponder is an automated email message sent in response to incoming emails. It's highly useful for notifying senders when you are out of the office, on vacation, or if their message has been received and will be addressed soon.
Configuring Autoresponders for Aliases
Setting Up Autoresponders for Email Aliases
Follow these steps to configure autoresponders for your email aliases in cPanel:
-
Log in to cPanel: First, access your cPanel dashboard by visiting the WHMCS client area at https://www.hosterpk.com/clientarea/ and navigating to your hosting account.
-
Navigate to Forwarders: In the cPanel dashboard, look for the Email section and click on Forwarders. This area allows you to manage your email aliases.
-
Create or Manage Aliases: If you haven't already, create an email alias by clicking Add Forwarder. Input the alias you wish to use and specify the email account(s) to which incoming messages should be forwarded.
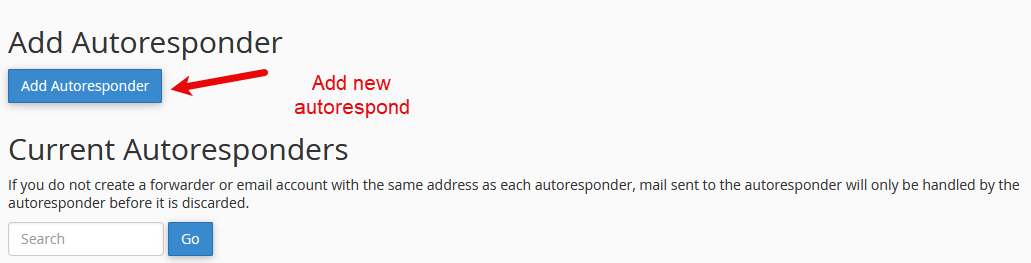
-
Configure the Autoresponder: Now, head to the Autoresponders section in the Email area of cPanel. Click on Add Autoresponder to set up a new autoresponse for your email alias.
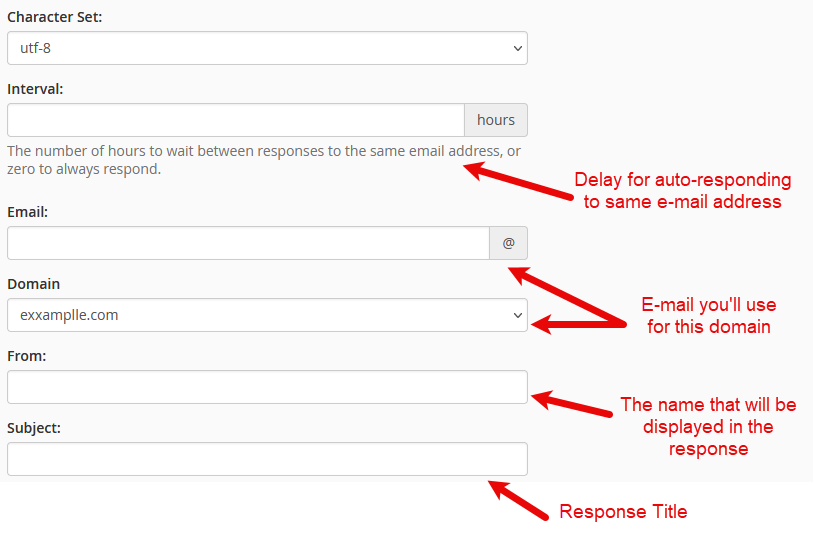
-
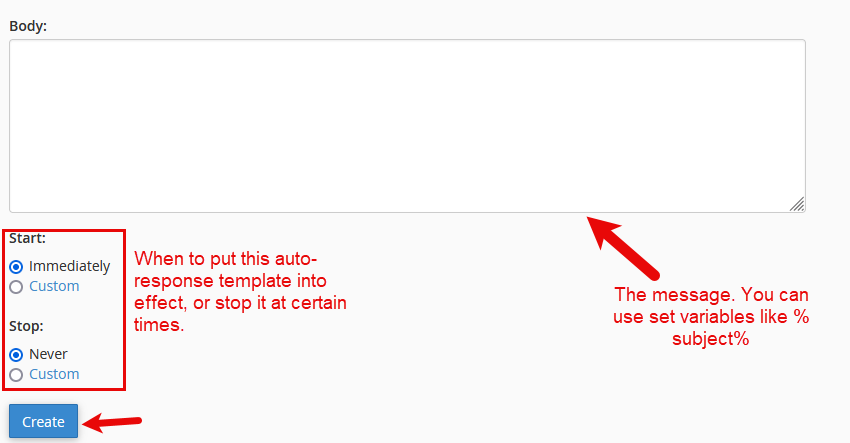
Set Autoresponder Details: You can leave the default setting in the Character Set dropdown. Fill in the Interval (how often an autoresponse is sent to a repeated address), the email address (your alias), the From and Subject lines, and the body of your autoresponse message.

Accessing the Email Trace Tool
The Email Trace tool allows you to check the status of email forwarders and troubleshoot any issues that may arise.
To use the Email Trace tool in cPanel:
- Log in to your cPanel account.
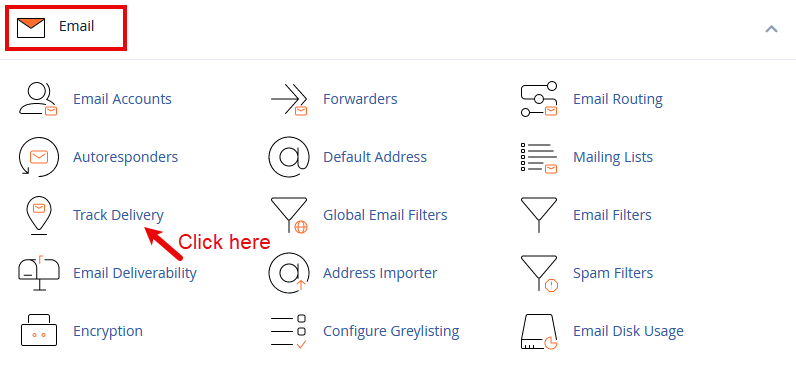
- Navigate to the Email section and click on Track Delivery or Email Trace, depending on your cPanel version.
- Here, you can search for specific email addresses to see the status of emails sent to or from them.
How to Use the Email Trace Tool
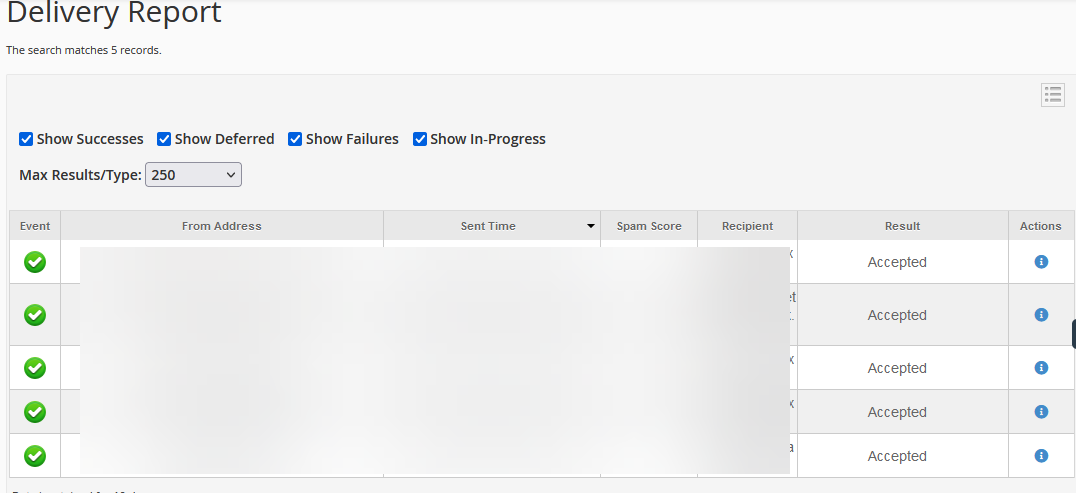
When using the Email Trace tool, you'll be presented with detailed logs that include information such as:
- Date and Time: When the email was processed.
- Sender/Recipient: Who sent the email, and who was supposed to receive it?
- Status: Whether the email was successfully delivered, deferred, or failed.
This information is invaluable for troubleshooting forwarding issues. For instance, if an email to a forwarded address is marked as "failed," you can investigate further to resolve the problem.
Troubleshooting Common Issues
If you encounter issues with email forwarders, here are a few troubleshooting tips:
- Check the forwarder configuration in cPanel to ensure the destination address is correct.
- Review the Email Trace logs for error messages that can help identify the issue.
- Ensure the destination mailbox is not full, as this can prevent forwarded emails from being delivered.
Conclusion
Email aliases and forwarders in cPanel offer a flexible way to manage your emails efficiently. Whether you're looking to simplify email management across multiple departments, set up automatic responses, or consolidate emails from various domains, cPanel provides the necessary tools. By following the steps outlined in this guide, you can effectively create, manage, and utilize email aliases to streamline your communication strategies.